Information
There is a setting you can enable in the Editor Preferences to disable and re-enable Blueprint nodes. Disabling nodes lets you "comment out" / ignore parts of a Blueprint without rewiring anything. Disabled nodes turn gray and are ignored when compiling, so that you can isolate problems and iterate faster.
If you prefer video, check out the YouTube tutorial series where I post a new Unreal Engine tutorial every single day.
Enable node disabling
In some Unreal versions, node disabling is hidden behind an editor setting.
- Open Edit > Editor Preferences.
- Go to Blueprint Editor settings.
- Find Experimental and enable Allow Explicit Impure Node Disabling.
If the disable option disappeared after an engine update, double check this setting first.
Disable and re-enable nodes
Once enabled, you can toggle nodes directly in the graph.
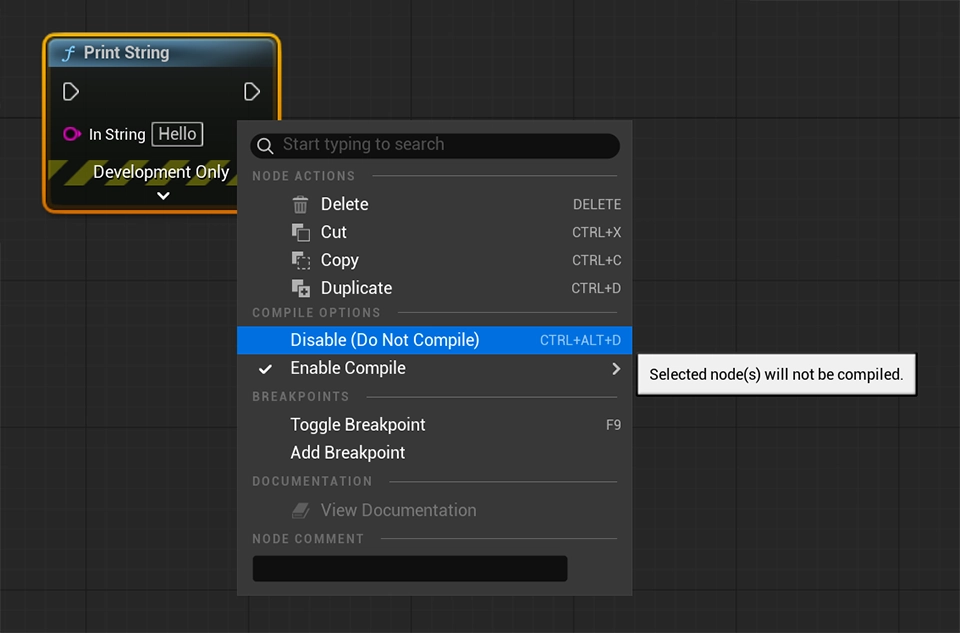
Disable a node
- Select one or more nodes.
- Right-click a selected node.
- Under Compile Options, choose Disable (Do Not Compile).
Re-enable a node
- Right-click the disabled node.
- Choose Enable Compile.
- Pick one of these:
- Always: runs in all builds.
- Development Only: runs in editor and development builds, not shipping builds.
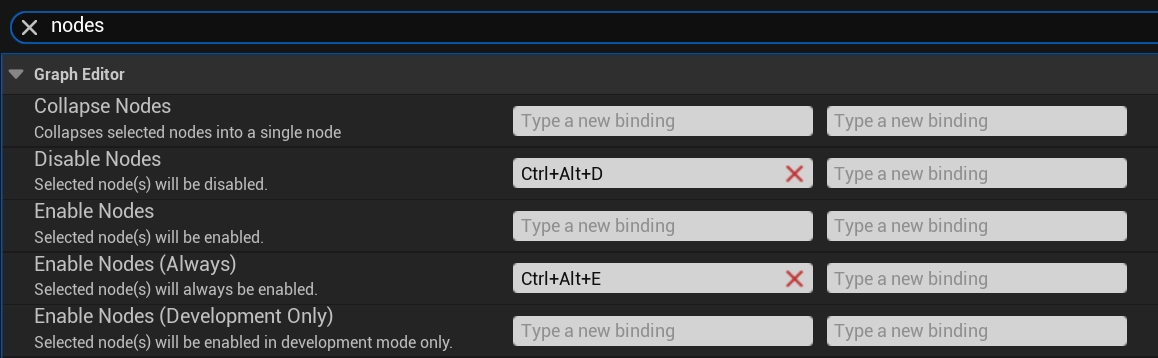
Add keyboard shortcuts
You can add custom keybindings to disable and re-enable nodes.
- Open Edit > Editor Preferences > Keyboard Shortcuts.
- Search for:
- Disable Nodes
- Enable Nodes (Always) (and any other Enable variants you use)
- Assign shortcuts that feel natural for you.
If the right-click menu options are missing, binding the commands can still make the workflow usable. In some engine versions, it is only exposed through shortcuts.