


Information
Bitmasks in Unreal Engine allow multiple flags to be stored inside a single integer value. Instead of creating a separate Boolean variable for every option, individual bits of an integer can represent whether different flags are enabled or disabled.
Blueprints also let you connect an Enum to a bitmask, replacing otherwise difficult-to-read bit values with clear names that can be selected directly in the editor.
Prefer watching a video instead? Check out our Video Tutorial on this topic.
Convert an Integer to a Bitmask
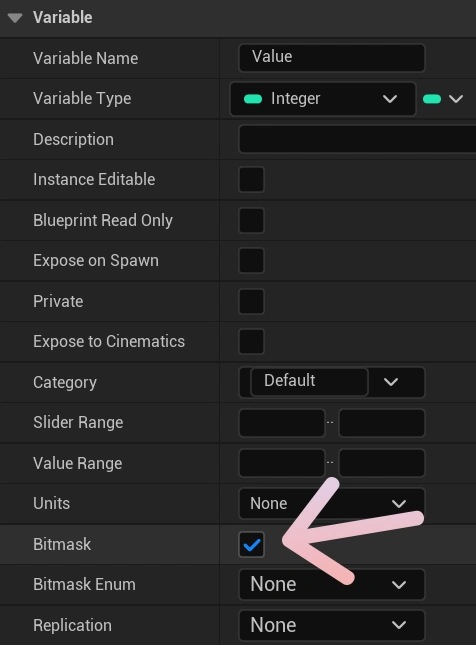
Create an Integer variable inside your Blueprint and select it in the My Blueprint panel. In the Details panel, enable the Bitmask option.
The integer will now behave as a bitmask, allowing multiple individual flags to be stored inside the same value.
Create a Bitmask Enum
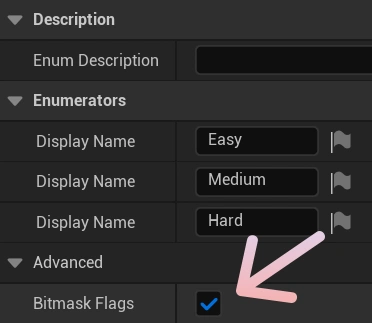
To give each bit a readable name, create a Blueprint Enum and add the entries you want to use as flags.
Open the Enum and enable Bitmask Flags. This allows the Enum to be used with integer variables that have been configured as bitmasks.
Connect the Enum to the Bitmask
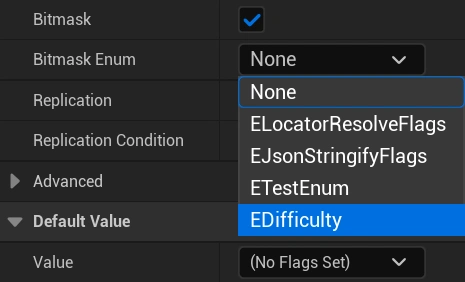
Return to your Blueprint and select the integer bitmask variable. In the Details panel, find Bitmask Enum and select the Bitmask Flags Enum you created.
The bitmask will now display the Enum entries as named flags, making it much easier to select and understand which options are currently enabled.
Use Bitmasks in Blueprints
Even after being configured as a bitmask, the value is still stored as an integer. This means you can use it with the available bitwise operations:
- Bitwise AND to check whether a flag is set or to clear specific flags.
- Bitwise OR to enable one or more flags.
- Bitwise XOR to toggle one or more flags on or off.
- Bitwise NOT to invert all bits in the value.
You can also use the Make Bitmask node to create a bitmask value directly inside a Blueprint graph.