Information
By default, Unreal Engine caps your FPS at 120. That can be helpful for saving power and keeping thermals under control. However, it's not ideal when you're profiling, playtesting, or just trying to hit the highest FPS your hardware can deliver.
The good news is that uncapping your FPS is usually just a couple of settings. Below are the most common ways to remove FPS limits in Unreal Engine. If you prefer video, check out the YouTube tutorial series where I post a new Unreal Engine tutorial every single day.
Uncap via console commands
These are great for quick checks in PIE or Standalone play.
- Open the console
- Set an explicit cap or remove it:
t.MaxFPS 120to cap at 120 FPSt.MaxFPS 0to uncap FPS
This change is temporary. If you want it to persist, add the setting in your config as shown below.
Make the FPS cap persistent
If you want uncapped behavior without typing a command every time, update your project config.
- Go to your project folder: YourProject/Config
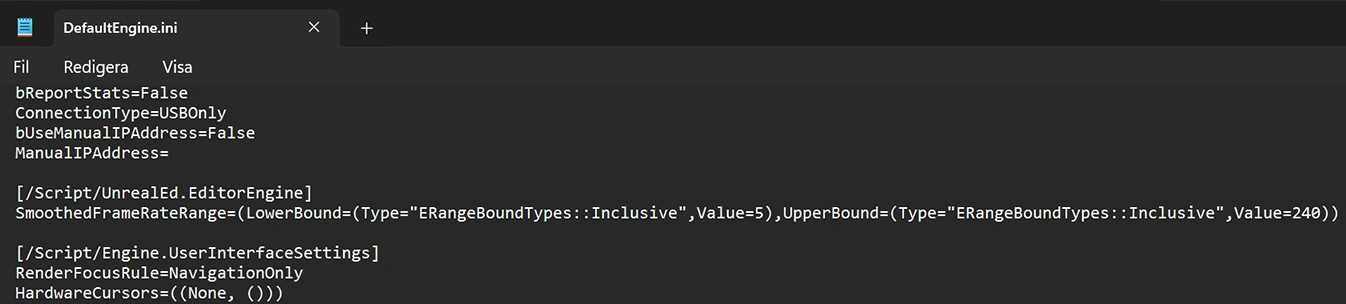
- Open DefaultEngine.ini
- Add or edit the following:
[/Script/UnrealEd.EditorEngine] SmoothedFrameRateRange=(LowerBound=(Type="ERangeBoundTypes::Inclusive",Value=5),UpperBound=(Type="ERangeBoundTypes::Inclusive",Value=120)) - Change the
UpperBoundvalue from120to your desired max FPS.
Editor-specific caps to check
Sometimes the Editor is capped even if your project isn't.
- Open Edit > Editor Preferences
- Search for: Use Less CPU when in Background. This setting reduces FPS when the editor window is unfocused.
Also watch out for:
- PIE vs Standalone behaving differently
- Running in a small viewport vs fullscreen
- GPU driver "Background application max frame rate" limits