Video Tutorial
What are Post Process Materials?
Post process materials in Unreal Engine and UEFN are materials that affect the final rendered image rather than a single object in the scene. You can think of them as full-screen camera effects that are applied after the scene has been rendered.
They are commonly used for effects such as outlines for interactable objects, damage overlays, underwater distortion, screen glitches, night vision, and cinematic lens effects.
If you are new to post process materials, we recommend first reading An introduction to post process materials to learn more about them. You can also read our Product Installation Guide if you need help installing plugins, assets, or asset packs in Unreal Engine and UEFN.
Getting the Post Process Materials
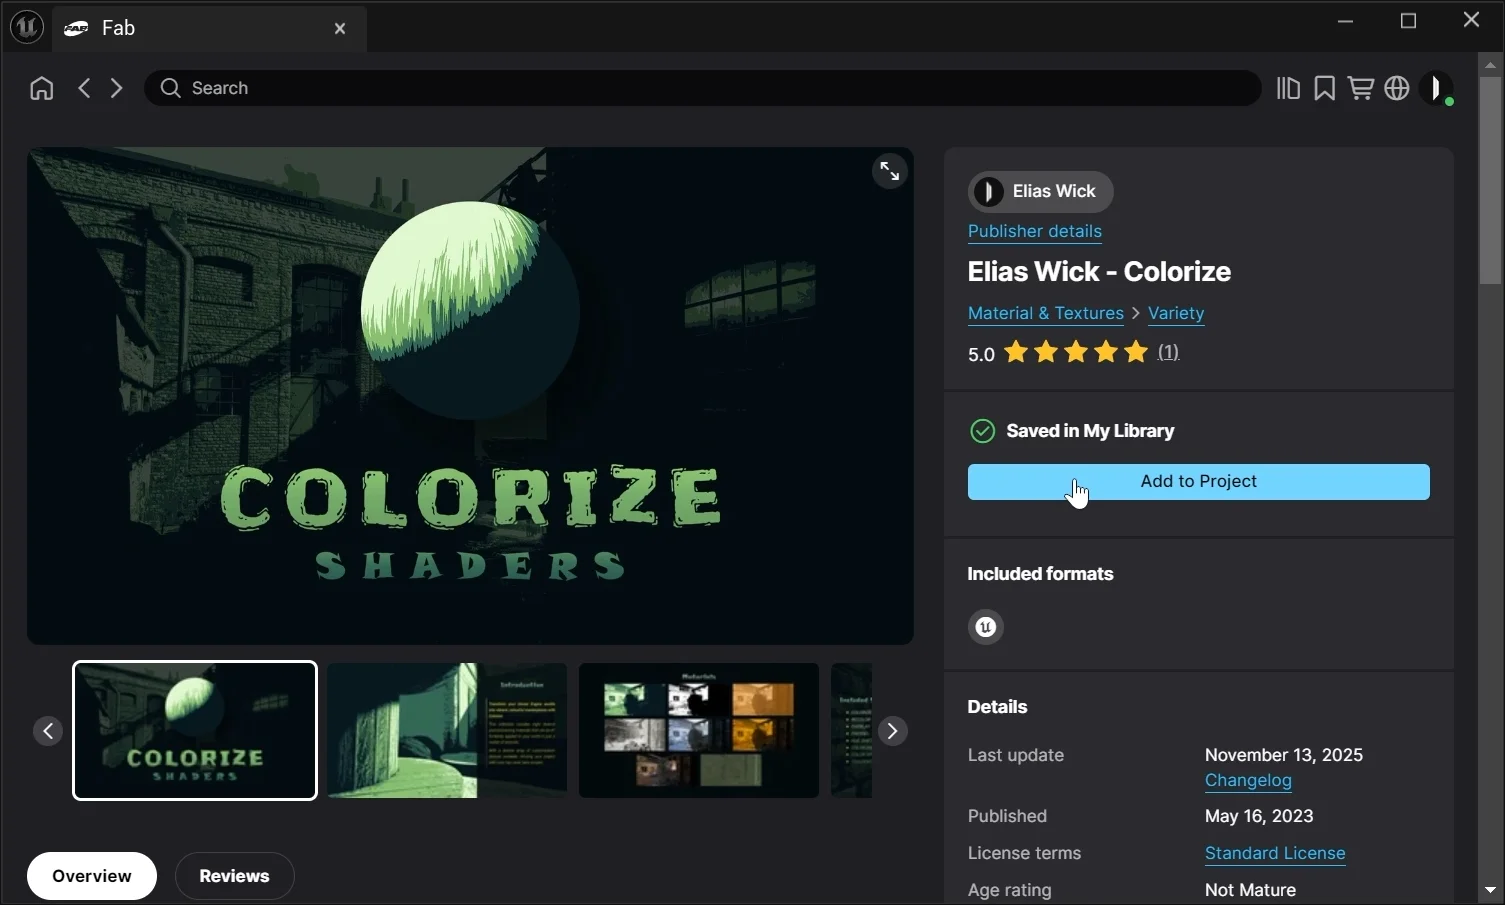
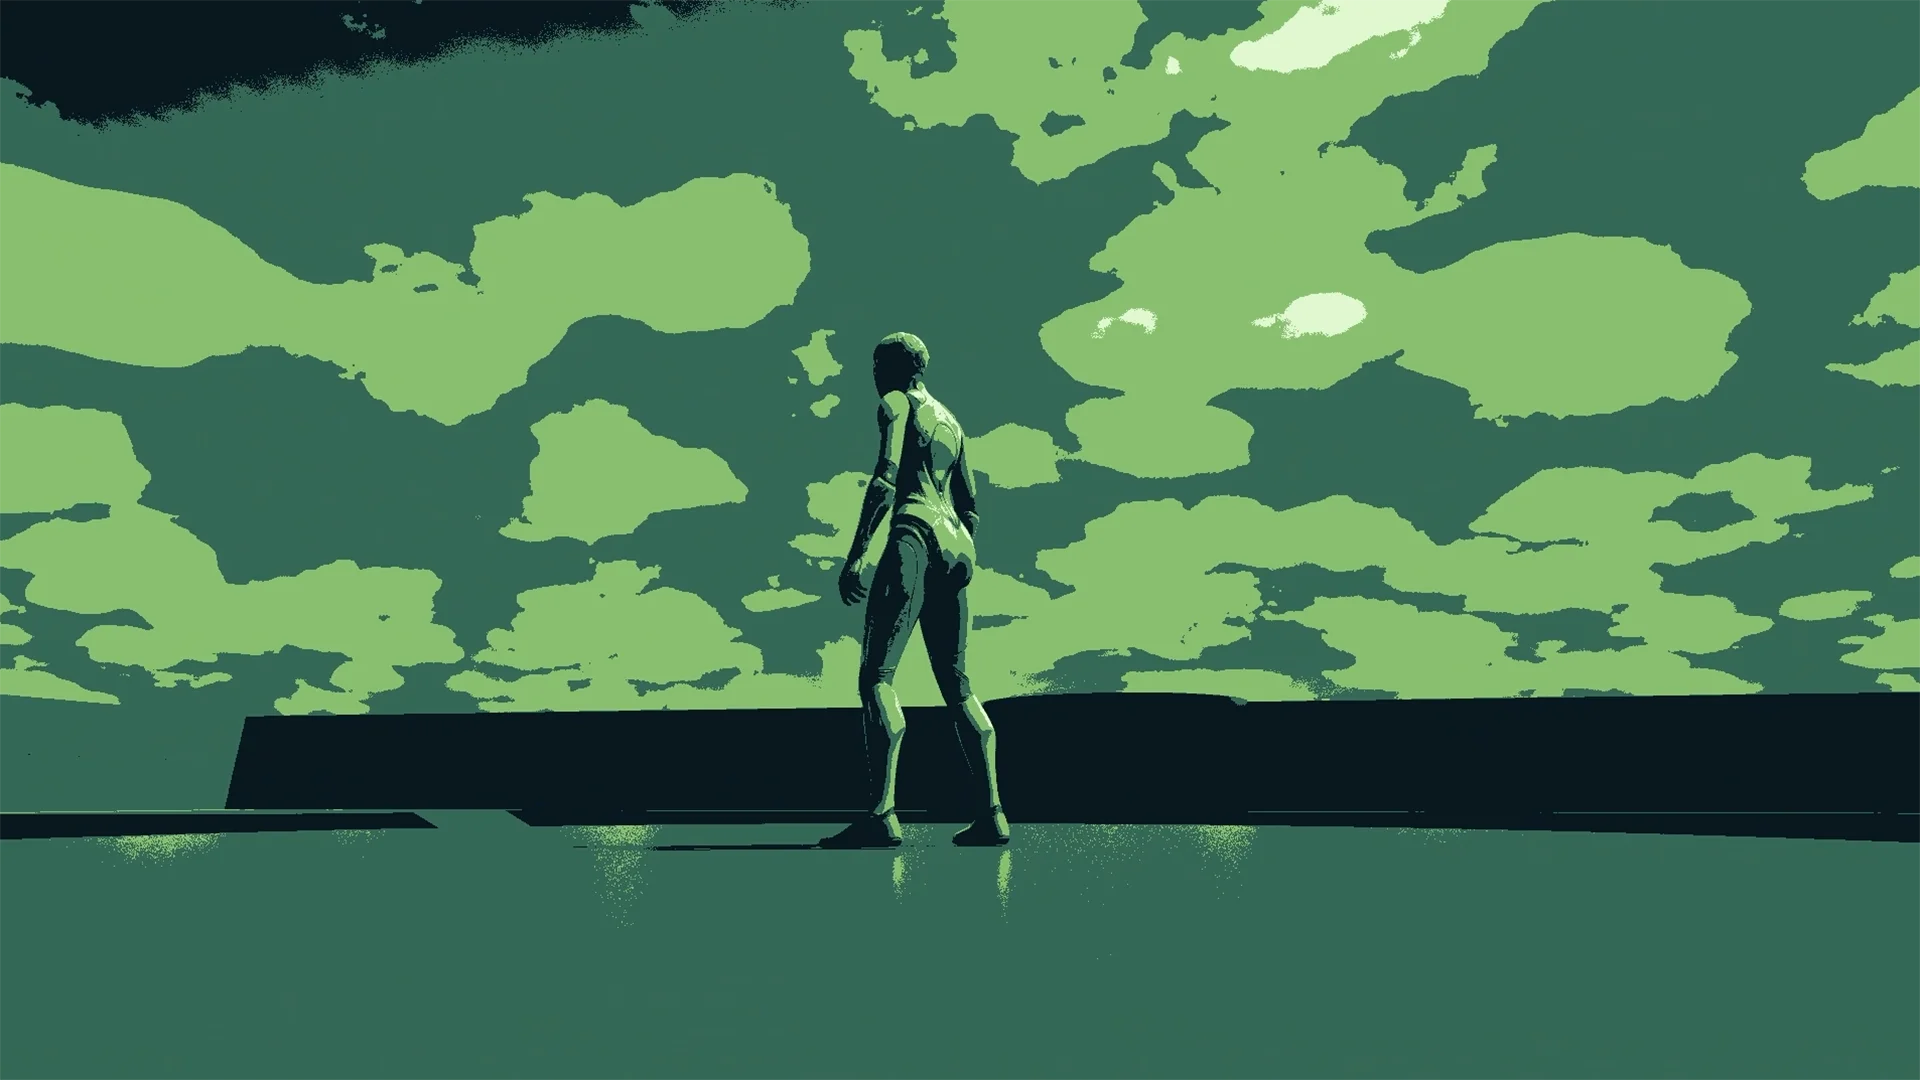
In this example, we will use our Colorize post process materials, available on Fab and Gumroad. Explore our full collection of post process materials on our product page.
- Open Fab from Window > Fab and search for Elias Wick.
- Select the post process material product you want.
- Complete checkout.
- Press Add to Project.
- The assets will then appear in your Content Browser.
How to add a Post Process Material to a Camera
Unreal Engine
If you want the effect to follow the player's view directly, you can add the post process material to a camera component.
- Open your Player Character Blueprint.
- Select the Camera component in the Components panel.
- In the Details panel, go to Post Process > Rendering Features > Post Process Materials.
- Press the + icon to add a new element.
- Click Choose and select Asset Reference.
- Open the dropdown that says None and assign your post process material.
Tips
- You can drag the material directly from the Content Browser into the material slot.
- You can stack multiple post process materials to create even more unique effects by adding additional array elements to the Post Process Materials section.
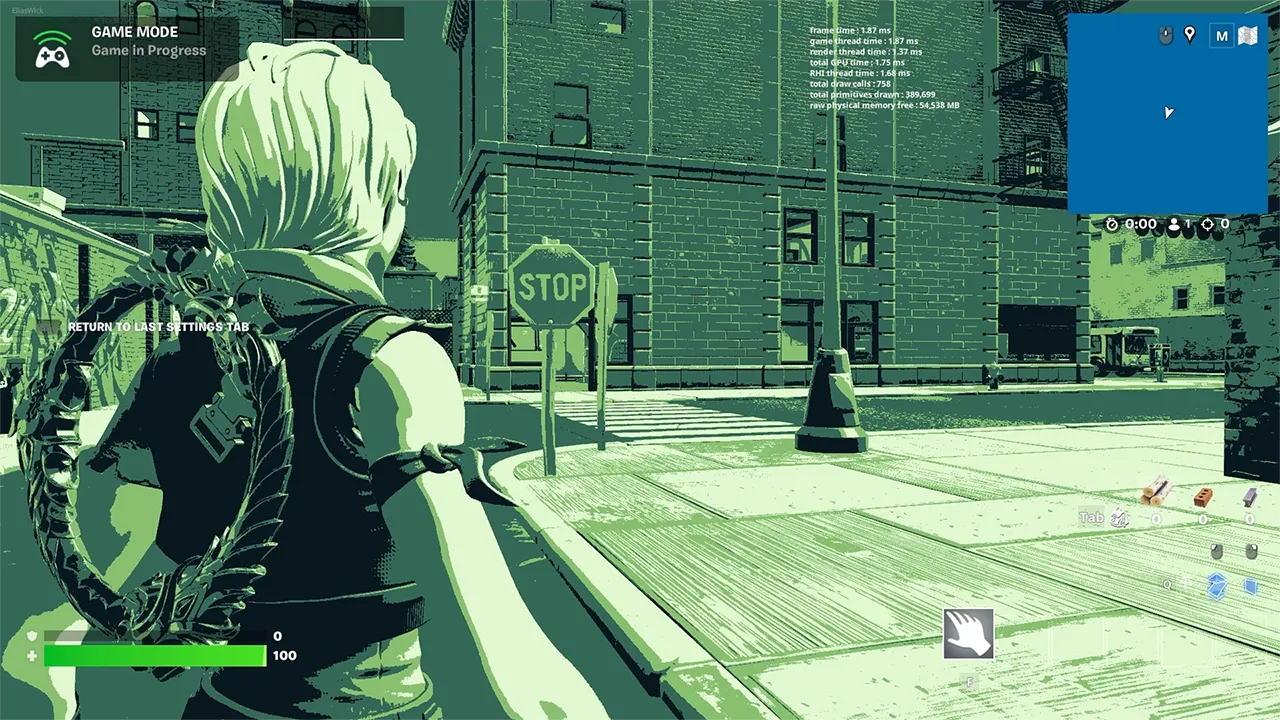
When you press Play and spawn with your character, the effect should now be visible.
How to add a Post Process Material to a Post Process Volume
Unreal Engine
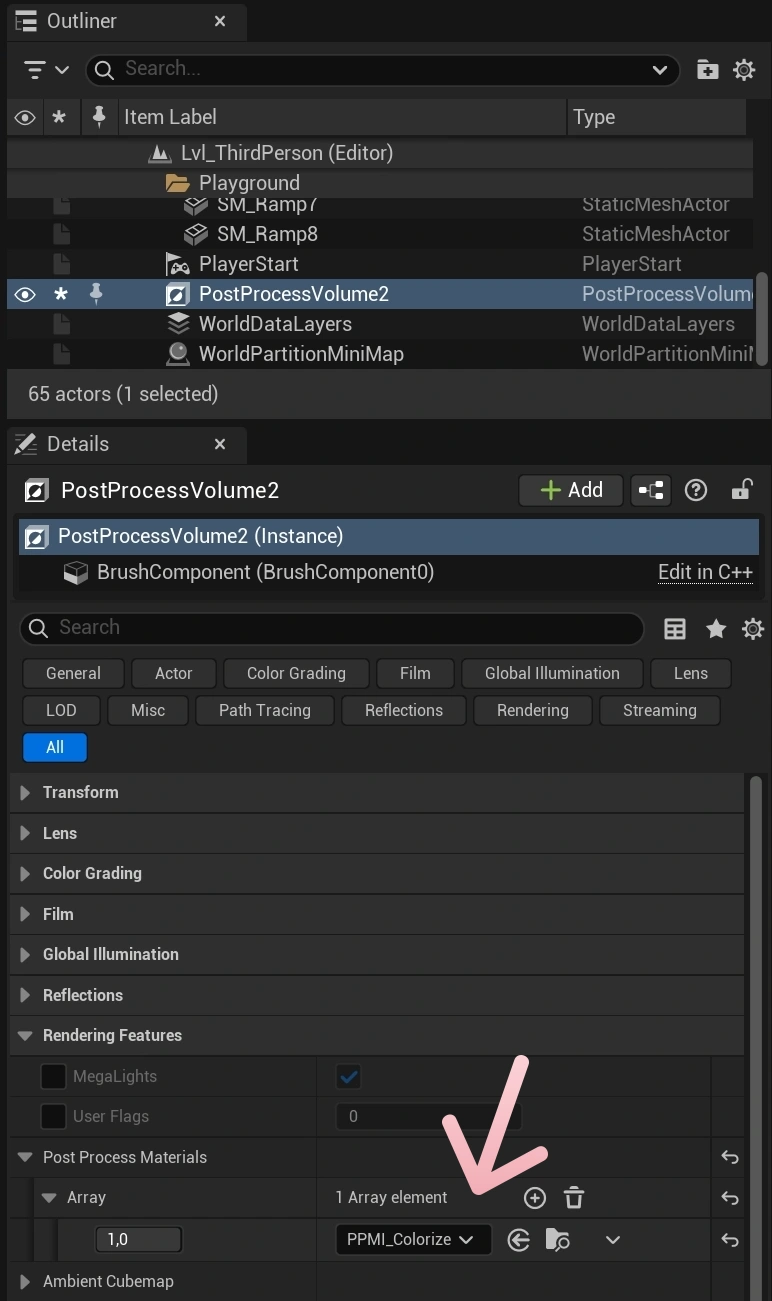
If you only want the effect to appear in a specific area of your level, using a Post Process Volume is usually the better option.
- Add a Post Process Volume from the Place Actors menu. You can find it under the Visual Effects or Volumes category.
- Select the Post Process Volume in your level.
- In the Details panel, go to Rendering Features > Post Process Materials.
- Press the + icon to add a new element.
- Click Choose and select Asset Reference.
- Assign your post process material.
If you do not see the post process material effect, make sure your camera is inside the volume.
You can enable Infinite Extent (Unbound) if you want the post process material to affect the entire world.
Using Post Process Materials in UEFN
Unreal Editor for Fortnite (UEFN)
At the time of writing, UEFN does not appear to support attaching post process materials directly to a camera. However, you can still use them through Post Process Volumes.
The setup is identical to Unreal Engine:
- Add a Post Process Volume from the Place Actors menu. You can find it under the Visual Effects category.
- Select the Post Process Volume in your level.
- In the Details panel, go to Rendering Features > Post Process Materials.
- Press the + icon to add a new element.
- Click Choose and select Asset Reference.
- Assign your post process material.
Note
At the time of writing, post process materials cannot be downloaded directly from Fab. To use them in UEFN, you must first get them for Unreal Engine and then migrate them using the installation workflow explained in the Product Installation Guide.
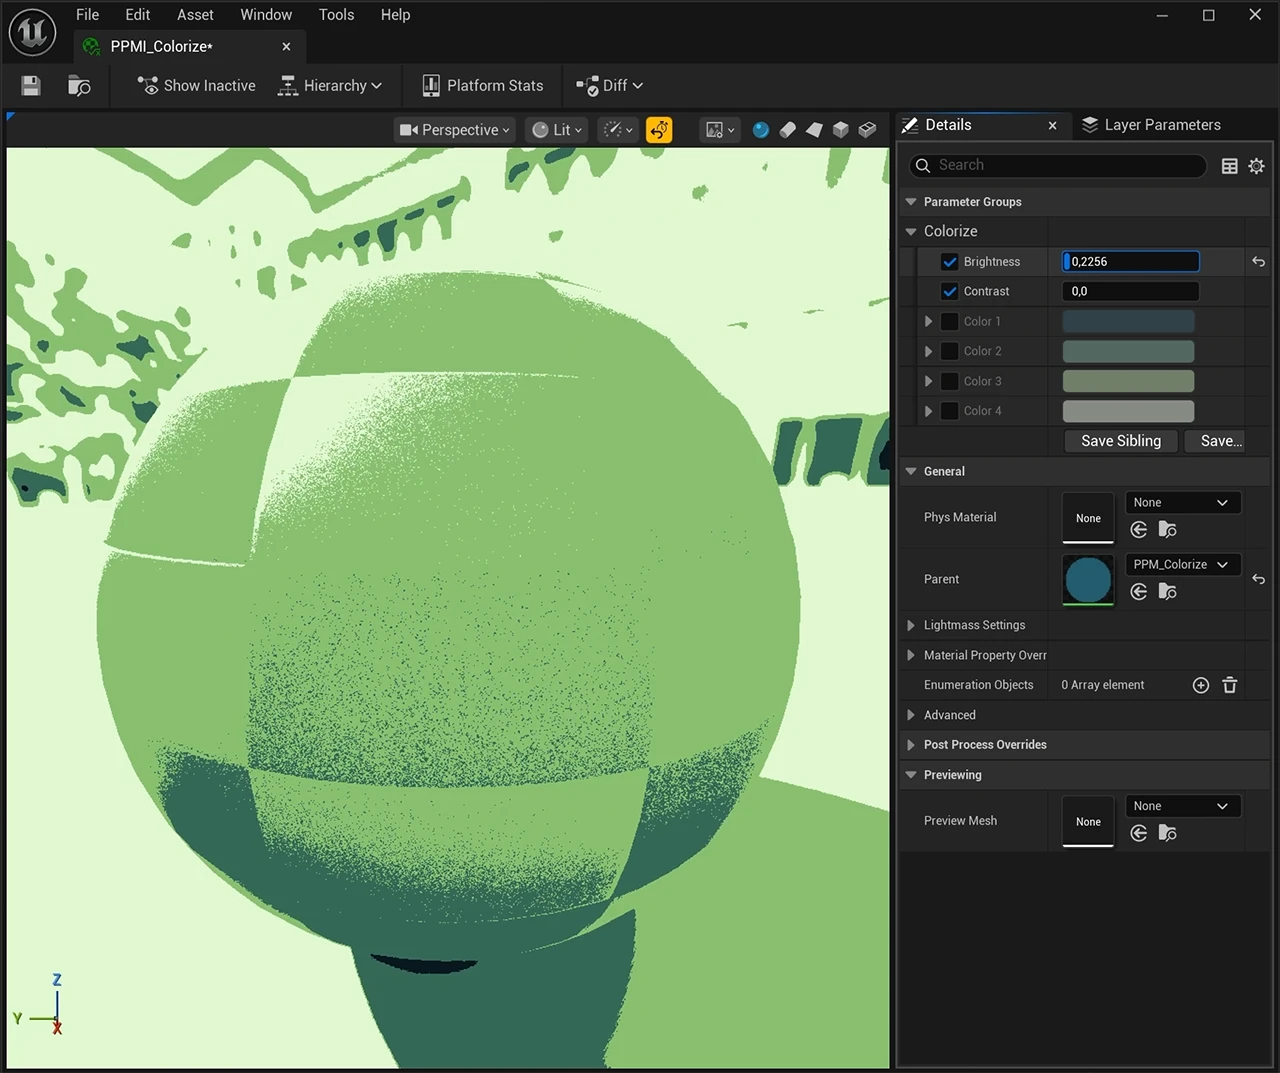
Using Material Instances
One of the advantages of our post process materials is that they are set up to be edited easily through material instances. To leverage this, make sure you assign the material instance as the asset reference instead of the base material. These are usually prefixed with MI or PPMI.
- Assign the material instance to your Camera or Post Process Volume.
- Double-click the material instance in the Content Browser.
- In the Details panel, open the Parameter Groups.
- Adjust the available settings to change the look of the effect.
Changes update immediately in the editor, which makes iteration much faster.
There is no performance difference between the base material and a material instance, so the material instance is usually the better choice when you want easier control over the visual settings.